✏️ Step-by-Step Magic
Setting the Stage (The Base)
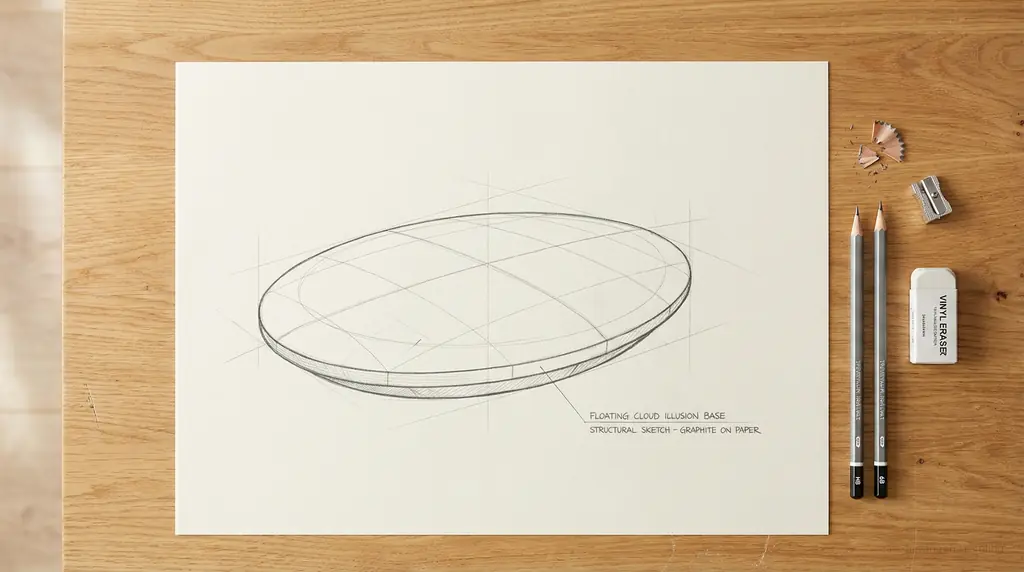
Every grand illusion needs a stage! We need to establish the flat surface where our cloud will appear to float. Lightly sketch a wide, very shallow oval across the middle of your paper. This oval represents the paper surface itself and acts as the grounding point for the shadow.
Building the Fluff and Volume
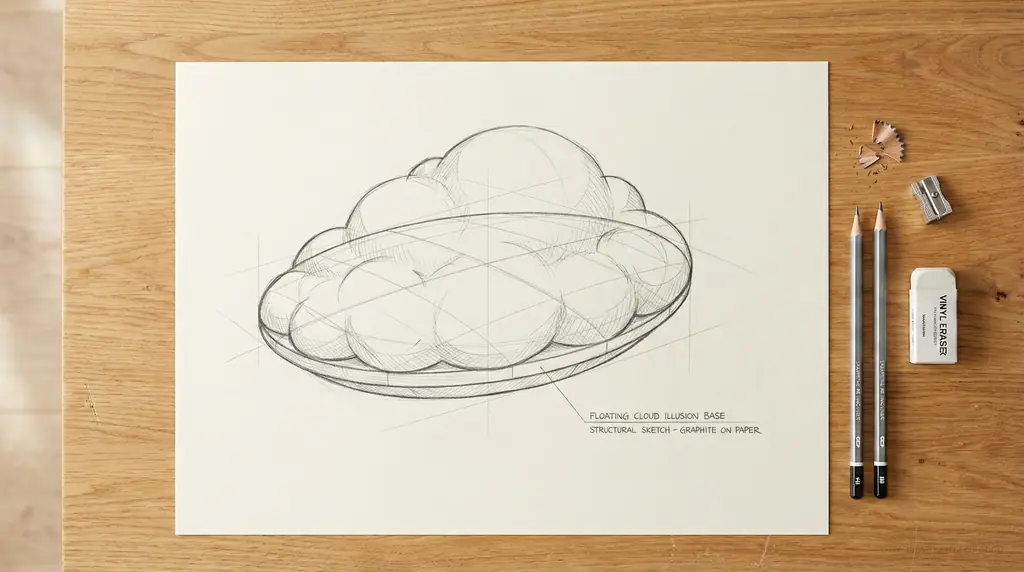
Now, let the cloud erupt! Starting from that oval base, gently stack loose, organic, irregular curved lines upward, creating the iconic puffy shape of a cumulonimbus cloud. Don't worry about making it perfectly symmetrical; clouds are wonderfully messy! Try to give it distinct top and bottom curves.
Anchoring the Illusion with Shadow
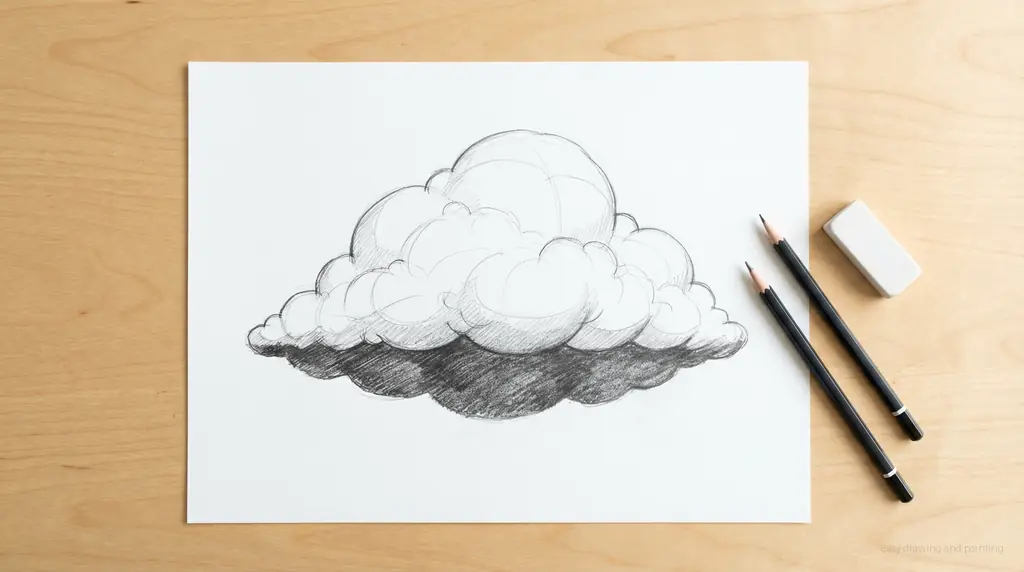
The secret to 3D lift is shadow! First, gently erase the parts of the initial oval line that are hidden *inside* the cloud shape. Now, use your pencil to heavily shade the area immediately underneath the cloud base, extending slightly onto the paper's surface. This dark shadow pushes the cloud forward and makes it visually *pop*!
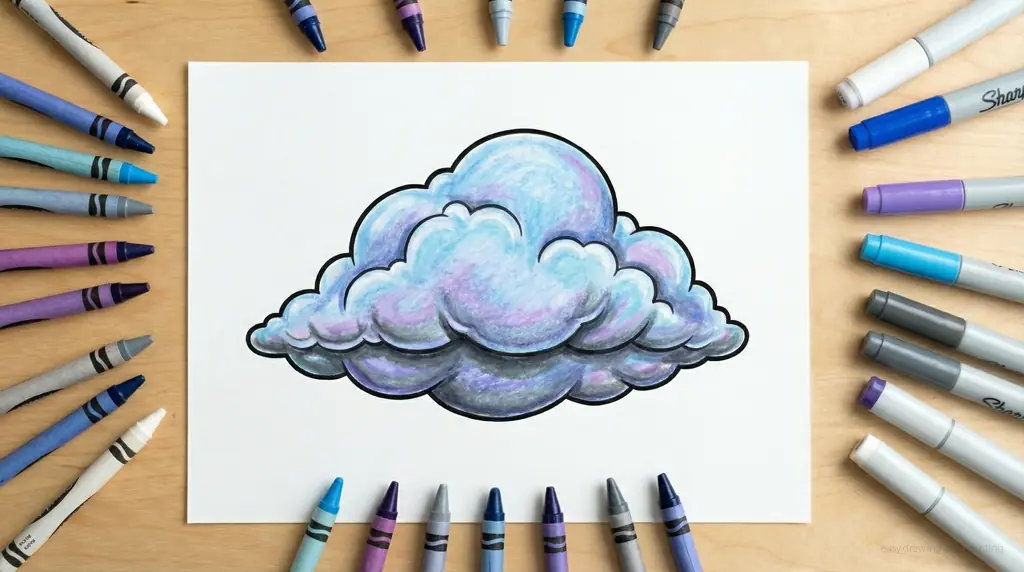
Ink the Magic (Your Coloring Page)
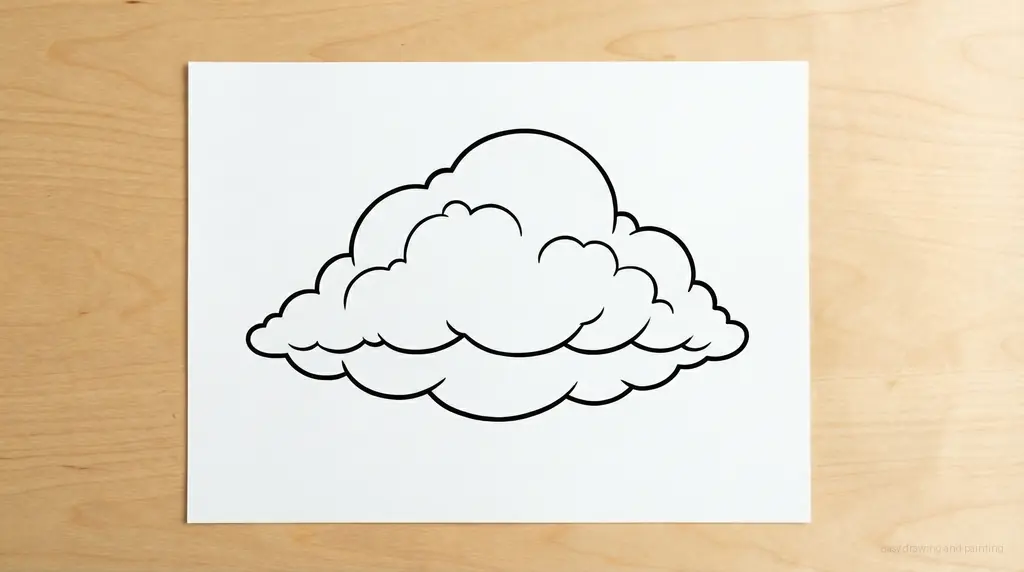
Time to immortalize the outline. Carefully trace the crisp, clean outlines of the cloud using your black marker. Focus only on the outer edges and the internal fluff contours that define its shape. We intentionally leave the ground shadow un-inked, as that will be added purely with color for a smoother transition!
Bringing the Dream to Life

The final touch of color brings the whole sky dream alive! Use soft blues and purples to gently shade the bottom curves of the cloud. The key is the shadow: use deep blue or soft grey crayon to intensify the shadow you sketched in Step 3, making it darker right where the cloud meets the paper. The sharp contrast between the bright white top and the dark shadow below is what truly fools the eye!
Community Drawings & Comments
Comments are coming soon! Stay tuned to share your masterpieces.